|
STUD
INSTALLATION |
|
PAD
INSTALLATION |
| 1 |
 |
1 |
 |
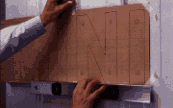
POSITION TEMPLATE
Templates are 30� per inch of letter height, $3.60 maximum per
letter. Templates are recommended for all stud mount letters.
Position and level template on surface, securing with masking
tape.
|
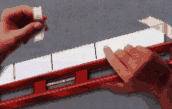
POSITION SPACING TAPE
Spacing Tapes are free upon request. Tapes show the general position of each letter
only. Position and level Spacing Tape on surface, securing with masking tape.
|
| 2 |
 |
2 |
 |
DRILL 1/4" DIAMETER HOLES IN TEMPLATE
Drill 1/4" diameter holes where indicated on template and into wall. Remove template
from surface and clean out each hole with compressed air. Air vents on the drill or a
turkey baster will work.
|
APPLY SILICONE TO FIRST LETTER
With the Spacing Tape still in place, apply silicone liberlly to all of the pads on the
first letter. Position the letter on the surface where indicated on the Spacing Tape.
|
| 3 |
 |
3 |
 |
INSERT STUDS INTO LETTER
To prevent scratching, letters and studs are packed separately. Insert studs into the back
of the first letter with silicone, spread silicone liberally on the studs of the first
letter and push into place.
|
TAPE LETTERS TO SURFACE
Use masking tape to hold the letter in place while the silicone cures. After the silicone
has cured, remove both the Spacing and masking tape.
|
| 4 |
 |
1 |
 |
STANDOFF
Allow for a minimum of 1/8" between the back of the letter and the surface. Use a
wood shim or match book to ensure that the standoff is the same for each letter. After the
silicone has cured, remove the masking tape. |
FLANGE INSTALLATION
One of the simplest methods of installation is the flange mount. Drill through the flange
into the mounting surface and secure. The drill hole should be slightly larger in diameter
than securing screw to allow for expansion and contraction. |